Share The Bliss
Blueberry Season Is Here: My Favourite Low-Sugar Spiced Blueberry Jam

Share The Bliss
Hello Beautiful Friends!
Every summer I look forward to blueberry season. As soon as the berries are ready, I start thinking about filling a few jars for the pantry. Homemade blueberry jam is one of those things we reach for all year, on toasted rice cakes, yogurt, pancakes, or with a piece of good sourdough.
I like to keep mine lower in sugar and let the blueberries be the main flavour. Instead of adding lots of sugar, I slowly simmer the berries with cinnamon, nutmeg, and cloves. It’s simple, and the spices add just enough warmth without taking away from the fruit.
Affiliate Disclosure: This post contains affiliate links. I may earn a small commission from qualifying purchases at no extra cost to you. As an Amazon Associate I earn from qualifying purchases. Click the highlighted links to shop my pick!
Start With Good Blueberries
The better the berries, the better the jam. If you can, grow your own or buy organic or unsprayed blueberries from a local farm. Freshly picked berries have the best flavour, and you know exactly how they were grown. I love my blueberry picker, it makes picking fast and easy on the blueberries!
Before I make jam, I wash the blueberries in my salad spinner. I fill it with cool water, add a spoonful of baking soda, and let the berries soak for about 10–15 minutes. Then I rinse them well with clean water and spin them dry. It’s a quick, gentle way to clean a large batch without bruising the fruit.
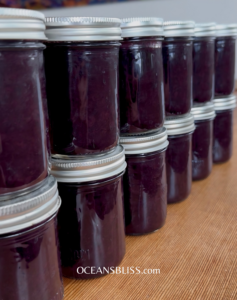
My Favourite Spiced Blueberry Jam
Makes about 4 half-pint (250 ml) jars
Ingredients:
– 8 cups fresh blueberries
– 1/4 – 1/2 cups sugar or honey
– 2 tbsp bottled lemon juice
– 2 tsp ground cinnamon
– 1 tsp ground nutmeg
– 1/8 tsp ground cloves
Instructions:
– Wash and sort the blueberries.
– Add all ingredients to a large stock pot.
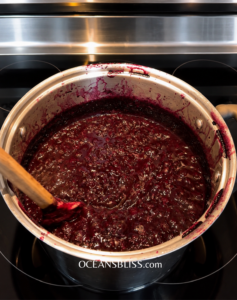
– Bring to a gentle boil, stirring often. (it’s going to get a bit messy!)
– Reduce the heat and simmer until the jam thickens, about 45–90 minutes depending on how juicy the berries are.
– Stir more frequently as it thickens to prevent sticking.
Water Bath Canning
– Fill hot, sterilized half-pint jars, leaving ¼ inch headspace.
– Remove air bubbles and wipe the rims clean – I love to use Swedish cloths instead of paper towels
– Apply lids and bands until fingertip tight.
– Process in a boiling water bath for 10 minutes (adjust for your altitude). Click here for my favourite Water Bath Canner
– Let the jars cool for 12–24 hours before checking the seals.
A Pantry Favourite
One of the reasons I enjoy canning is that it lets me make the most of what’s in season. Blueberry season doesn’t last long, but a few jars on the pantry shelf mean we can enjoy those summer berries for months to come. If you have access to fresh blueberries this year, I hope you’ll give this recipe a try. It’s simple, full of flavour, and one of my favourites to make every summer.
DIY Disclaimer: This content is shared for informational, inspirational and educational purposes only.Please use appropriate safety precautions and your own judgment when attempting any project. We are not liable for any injury, damage, or loss resulting from use of this information. This guide reflects the methods I personally use in my own home.

Featured Product
‘Harvest-to-Jar’
Realistic Canning Yields: Fruits & Vegetables
Two-page downloadable guide with bonus content!